How To Create A Vpn On Macbook Pro
How To Connect Your Mac To Any Vpn And Automatically Reconnect

How To Connect Your Mac To Any Vpn And Automatically Reconnect
Mac Os X L2tp Client Setup Softether Vpn Project

How To Connect To A Vpn On Your Mac Imore
How To Connect To A Vpn On Your Mac Imore
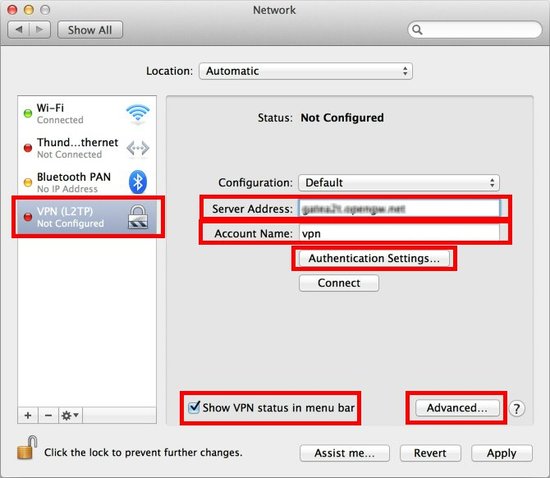
Mac Os X L2tp Client Setup Softether Vpn Project
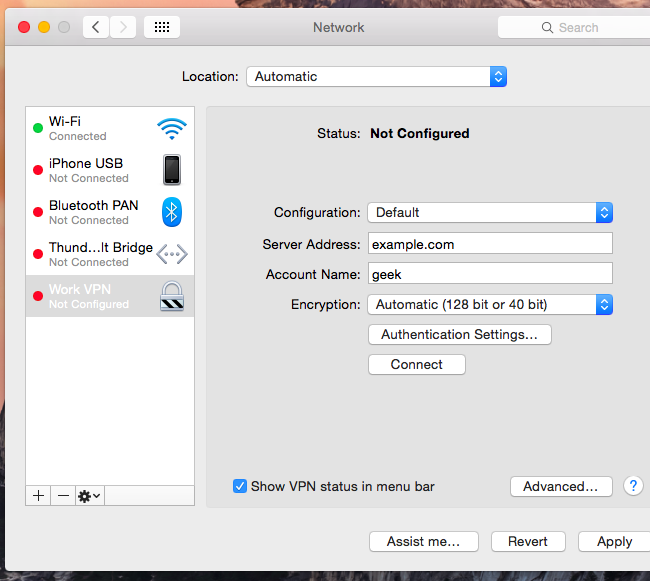
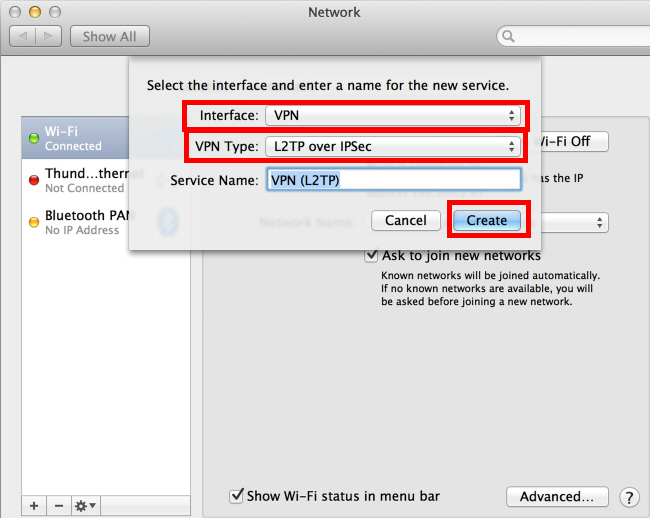
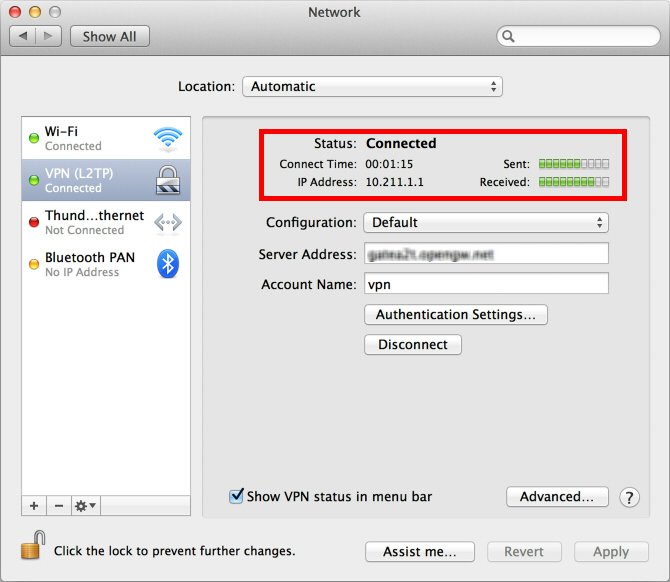
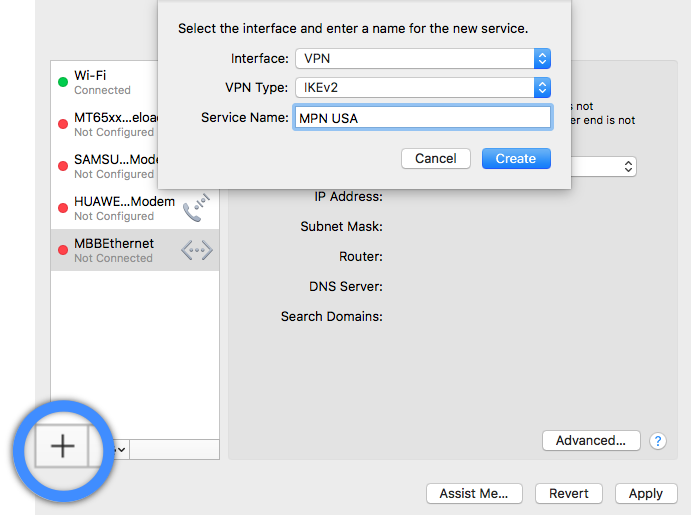
Select your vpn service in the list on the left.
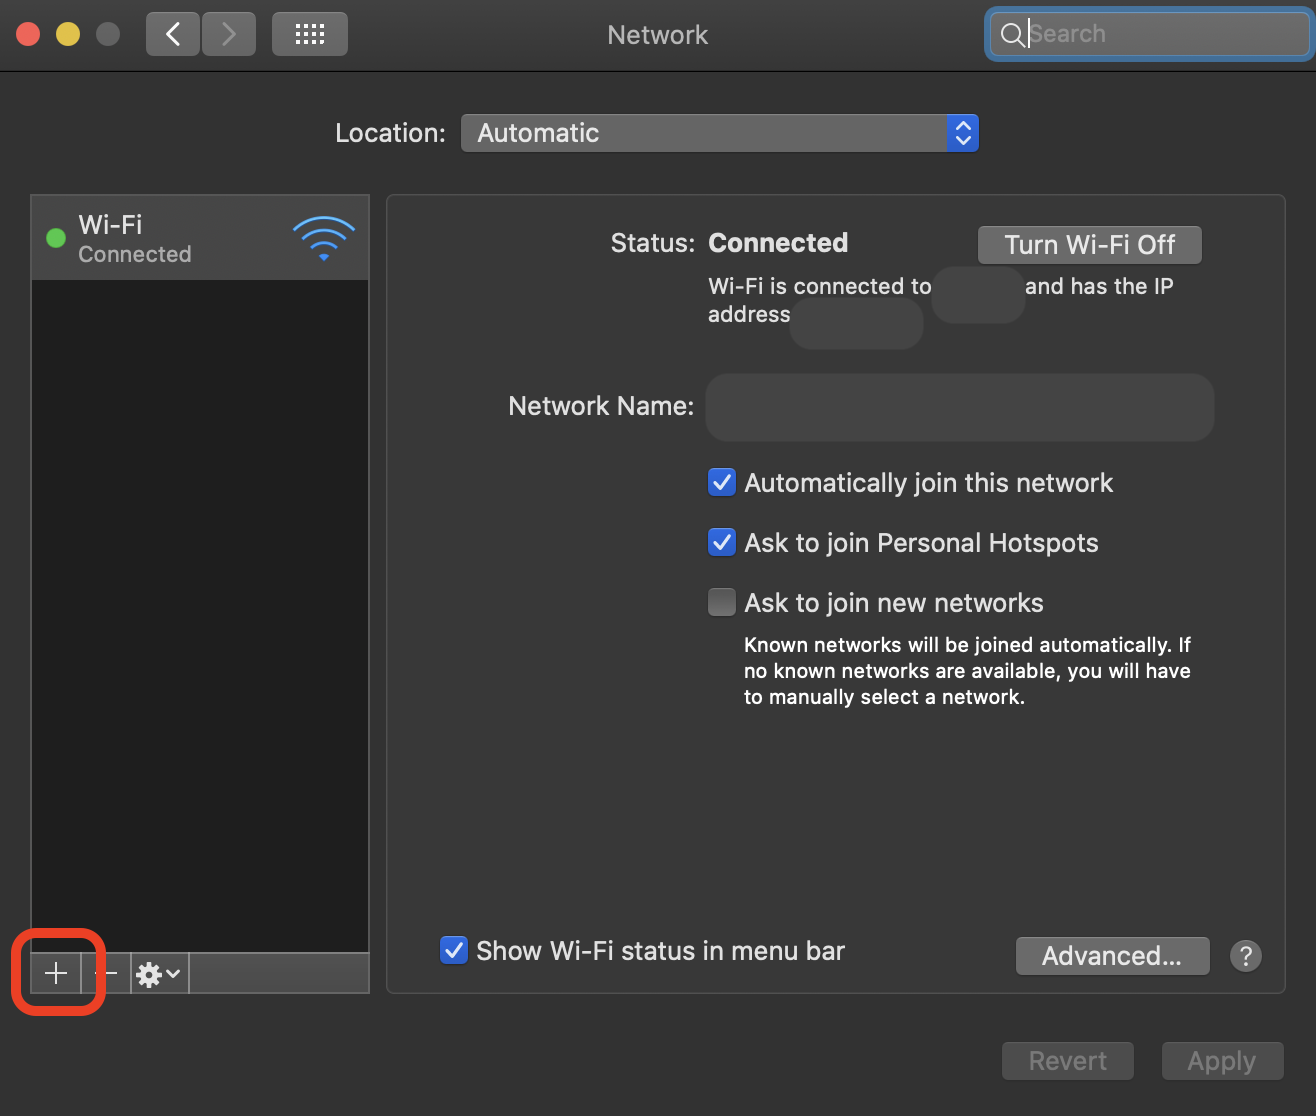
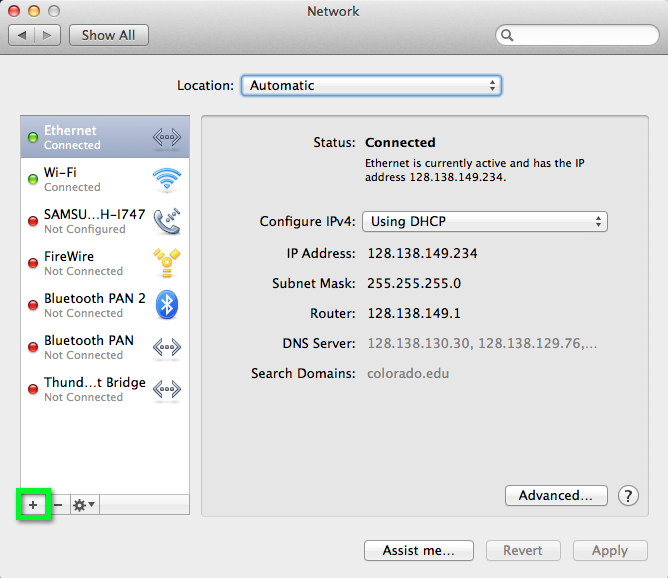
How to create a vpn on macbook pro. You don t need to have some solid reason to use virtual private network vpn on your mac. Click the add button in the list at the left click the interface pop up menu then choose vpn. If you want to learn how you can set up a vpn on your mac then you are at the right place. To connect to a virtual private network vpn you need to enter configuration settings in network preferences.
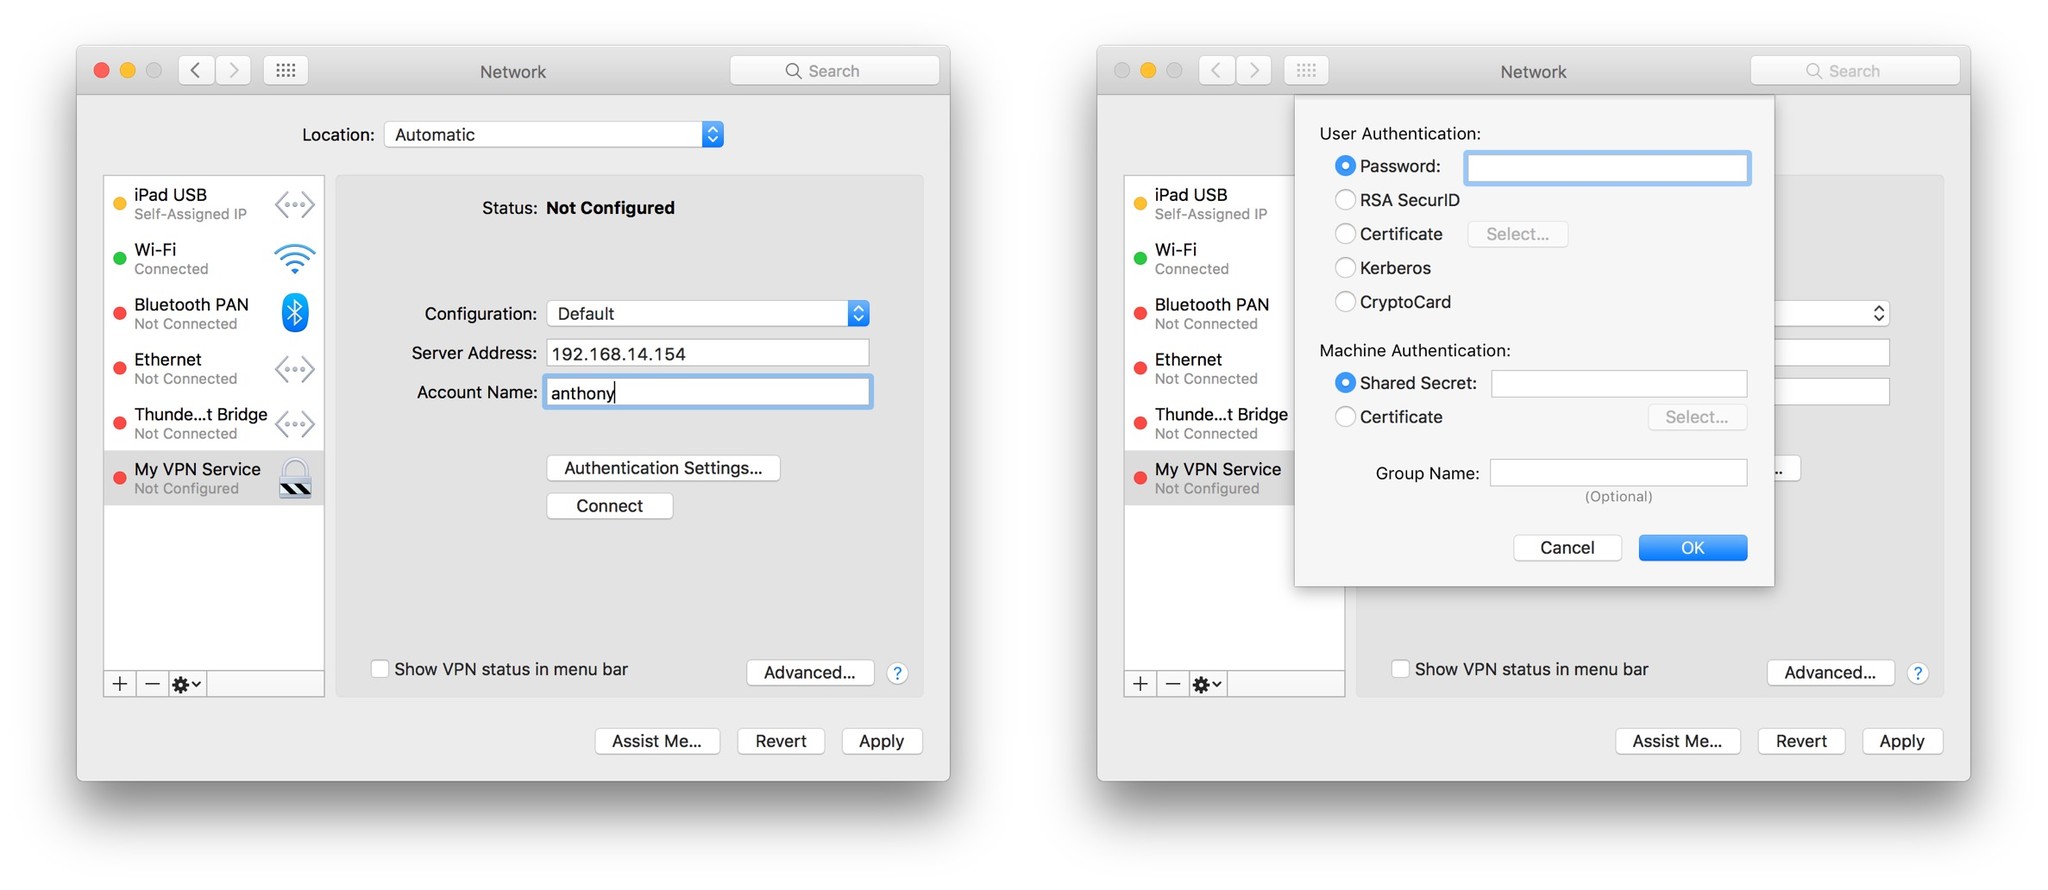
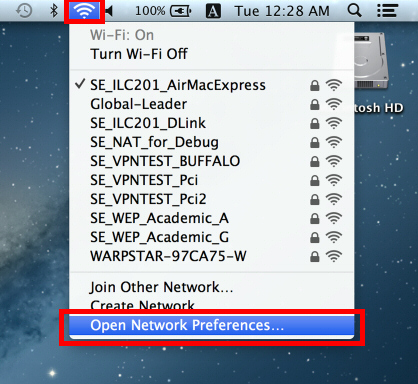
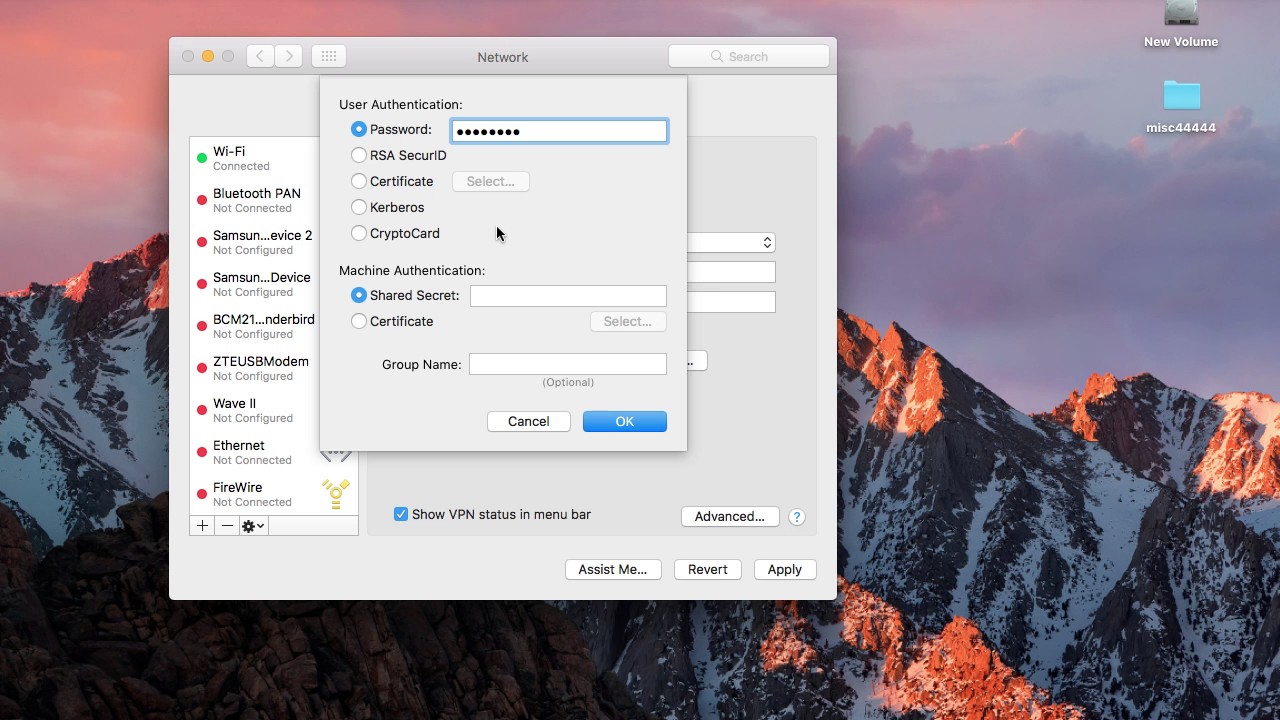
This information is also supplied by your vpn provider. If there s a configuration pop up menu click it then choose a configuration. Enter vpn settings manually. Open network preferences for me.
Select the vpn type provided by your vpn. Click on the apple icon in the upper left corner of your mac s screen. Click the vpn type pop up menu then choose what kind of vpn. You could use it for safe browsing on a public wifi network accessing region unavailable content keeping your file sharing activity private and hiding your location.
Click on system preferences. These settings include the vpn server address account name and any authentication settings such as a password or a certificate you received from the network administrator. The hostname or ip address of the vpn server goes into the remote host box. There may be only one configuration available.
This is not a hard task you can easily. Select vpn from the interface drop down list. On your mac choose apple menu system preferences then click network. How to connect to the vpn when no third party app is provided.
The username and password you enter are the ones you use for the vpn server not the one you use to log into macos. This all can manually set up via your network configuration in system configurations on you re mac. On your mac choose apple menu system preferences then click network.
Mac Os X L2tp Client Setup Softether Vpn Project

How To Connect To A Vpn On Your Mac Imore
Mac Os X L2tp Client Setup Softether Vpn Project
Here S How To Set Up Any Vpn On Mac
Macos Ikev2 Vpn Setup My Private Network Vpn

How To Connect Your Mac To Any Vpn And Automatically Reconnect

How To Set Up A Vpn Server On Your Mac And Access Everything
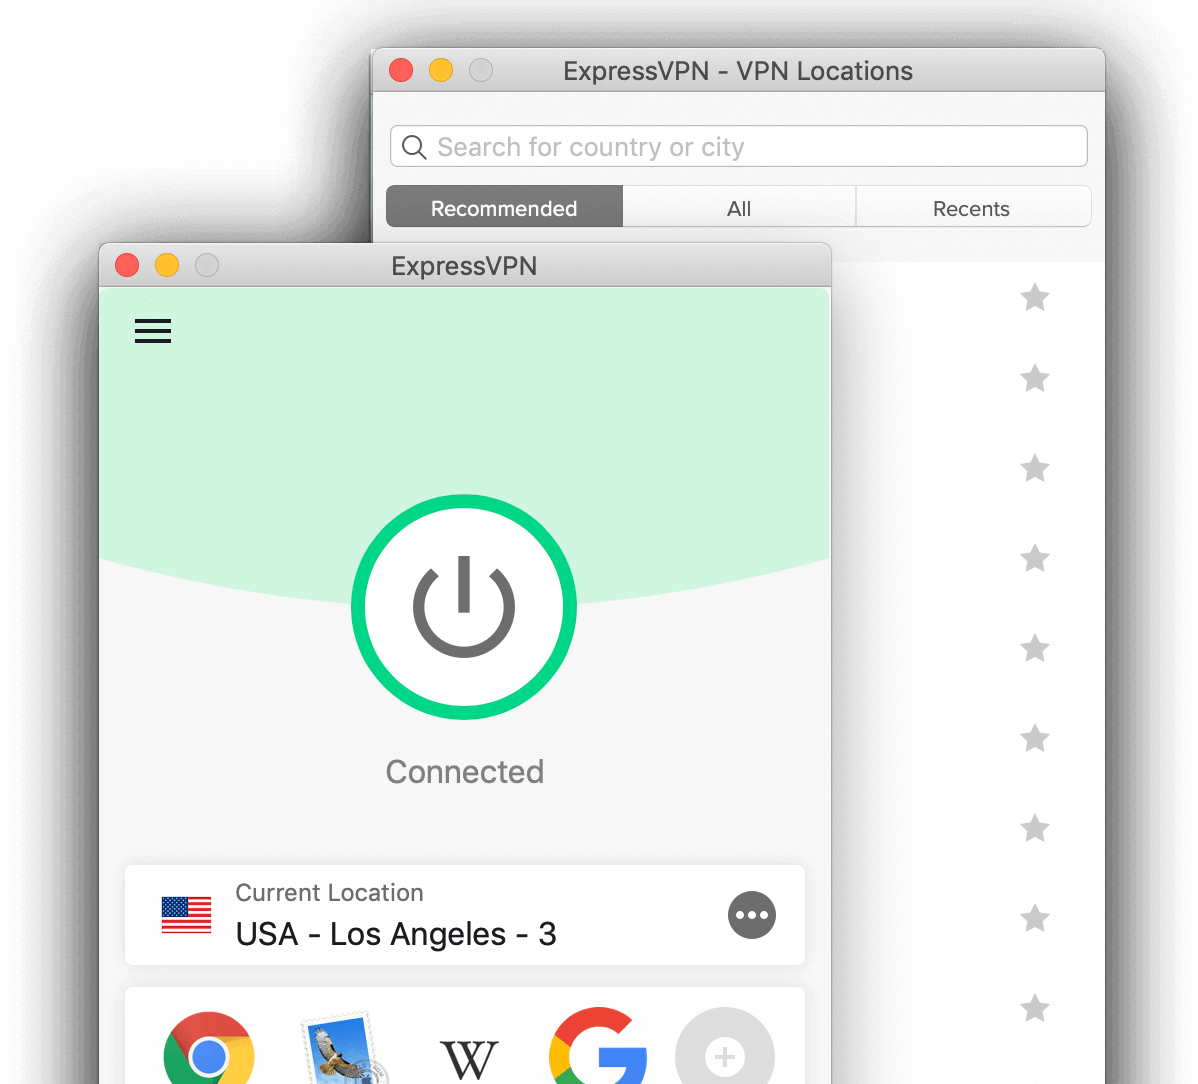
Download A Vpn Client For Mac Expressvpn
Vpn Connect With Cisco Ipsec For Mac Office Of Information
Mac Os X L2tp Client Setup Softether Vpn Project

The Ultimate Guide To Creating A Virtual Wifi Safervpn

Share Your Vpn Connection Over Wi Fi Using Mac Os X Safervpn
:max_bytes(150000):strip_icc()/how-to-set-up-a-vpn-on-mac-4582251-01-5c267a4146e0fb00012c7d50.jpg)
How To Set Up A Vpn On Mac
Mac Osx Sierra Vpn Setup Youtube
